Creating a Chrome Extension
First steps to develop extensions for Google Chrome, with local data storage and direct interaction with the DOM
 Chrome Environment
What is a Chrome extension?
According to documentations, it is a small software program designed to run on the Google Chrome web browser. These extensions are designed to add extra functionality to the browser, personalize the user experience, and improve productivity.
Extensions can be downloaded and installed from the Chrome Web Store, which is Chrome’s app store.
What do we intend to do?
To understand a little about extensions, we will make a simple autofill application. Basically the plugin must save data in its own local storage and it must be possible to input the data directly into the DOM.
Only HTML, CSS, and JavaScript languages will be used for development, it seems simple, right?
Creating the Extension?
To carry out this tutorial you will need to have a text editor installed on your machine.
After installation, we will start development. The Chrome API has a service that needs a configuration file called manifest.json, with all the information needed to initialize the extension, for example:
{
    "name": "Demo",
    "version" : "1.0",
    "description" : "Demo",
    "manifest_version" : 3,
    "author" : "Falchi",
    "icons": {
        "16": "logo.png",
        "32": "logo.png",
        "48": "logo.png",
        "64": "logo.png",
        "128": "logo.png"
    },
    "background" : {
        "service_worker" : "background.js"
    },
    "content_scripts": [
        {
            "matches": ["<all_urls>"],
            "js": [
                "content.js"
            ]
        }
    ],
    "permissions": [
        "tabs",
        "webNavigation",
        "webRequest",
        "storage",
        "scripting",
        "activeTab"
    ],
    "host_permissions": ["<all_urls>"],
    "action": {
        "default_popup": "ext/index.html",
        "default_icon" : "logo.png",
        "default_title": "Teste"
    }
}
Now it will be necessary to create a messaging file called background.js, which will be our main service for the conversation between the extension data.
chrome.runtime.onInstalled.addListener(async() => {
    let url = chrome.runtime.getURL('hello.html')
    let tab = await chrome.tabs.create({ url })
    console.log(`Created tab ${tab.id}`)
});

chrome.tabs.onUpdated.addListener(function(tabId, changeInfo, tab) {
        chrome.tabs.query({ active: true, currentWindow: true }, function(tabs) {
            chrome.storage.local.get(['datademo'], (result) => {
                chrome.tabs.sendMessage(tabs[0].id, {
                    data: result.datademo,
                    action: 'fill-form'
                });
            });
        })
});

chrome.tabs.onActivated.addListener(function(activeInfo) {
    chrome.tabs.get(activeInfo.tabId, function(tab) {
        console.log(tab.url);
    });
});
Finally, it is necessary to create a service called content.js, which will be our DOM manipulation service.
window.addEventListener('message', function(event) {
    if (event.source === window && event.data.type === 'FROM_ANGULAR') {
        const receivedMessage = event.data.payload;
        chrome.storage.local.set({ 'datademo': JSON.parse(receivedMessage) }, () => {
          //salva os dados no chrome storage
        }
    }
}

chrome.runtime.onMessage.addListener(
    async function(request, sender, sendResponse) {
        //inputar os dados diretamente no DOM
        document.getElementById("inputtext").value = request.data.datademo.textvalue;
        document.getElementById("inputnumer").value = request.data.datademo.numbervalue;
        document.getElementById("date").value = request.data.datademo.datevalue;
        document.getElementById("save").click()
    }
);
Now data saved in Chrome storage, which allows extensions and web applications to store data on the user’s device, such as settings, preference information and other relevant information, is input directly to the target page.
Now to call the extension directly from an Angular application, you just need to send the postMessage function.
window.postMessage({ type: 'FROM_ANGULAR', payload: JSON.stringify(data)}, '*')Deployment
Okay, our extension is finished! Now just add it manually to your browser in the Manage Extensions tab of Google Chrome.
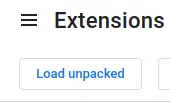 Extensions tab
Thanks for reading
Hope you found my blog fun. If you have any questions, you can check my blog’s repo on Github or feel free to reach out to me on LinkedIn.